Popular Highlights
When only a watchmaker will do
Restoration of Omega Jump Seconds Clock
| The HTI Shop Tour |
 At the turns |
|||
| Many
of my customers are intrigued by the tools I use. Additionally,
many watch and clock restorers have not had the benefit of education I
enjoyed. So, this page is dedicated to those who would like to
learn more about some of the tools I use in horological restorations.
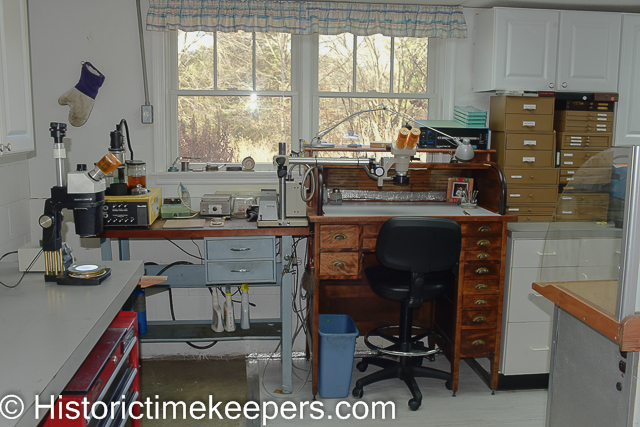
I will not take the time to show all the various casing tools, Witschi timing machine and bench tools required of the modern brand certified watchmaker. I had everything required to be an Omega Recognized Service Provider. I gave up my Omega agreement recently because of the cost of equipment needed to service the new ultra tight watch cases. I could not justify the cost ($8000) of the water leak tester when most of my work is restoration. But it meant I was trained on the latest techniques. The only real change was I could go back to my MU-700 since I did not need the Witschi and a quartz analyzer to have that account. Many of my customers initially come to me because they have a unique piece, a problem that has puzzled other watchmakers, or something that requires parts to be made. Initially, potential customers are interested in whether I possess the equipment and skill to meet their requirements. This page describes the equipment; other pages document my skills. Here are some general shop views. I have tried to make the layout so that similar operations are grouped together and that the dirtiest operations are furthest from my watch bench. I also have tried to make it as simple as I can to make adjustments while fitting pieces. For example, just behind my assembly bench is my staking/polishing/filing bench. Over my left shoulder is my small lathe bench where I can quickly set up for adjusting or making a balance staff. All accessories are very near the machine to which they belong. That sort of thing. The following photos show my work area a couple years. After those are photos as of Jan 2018. A shop is an iterative process. You ill note especially the Witchshi is gone in favor of the Vibrograf MU-700. I also did some changes to the floor, added a Nikon SMZ-1B for bench work and jewelling. The Varimatic is gone because my precleaning is done using jars in a tank style ultrasonic (Branson). That cleaning machine bench also holds my hot pallet which I use for heating pallets and detents which are then brought to my bench on a tile for manipulation under the microscope.
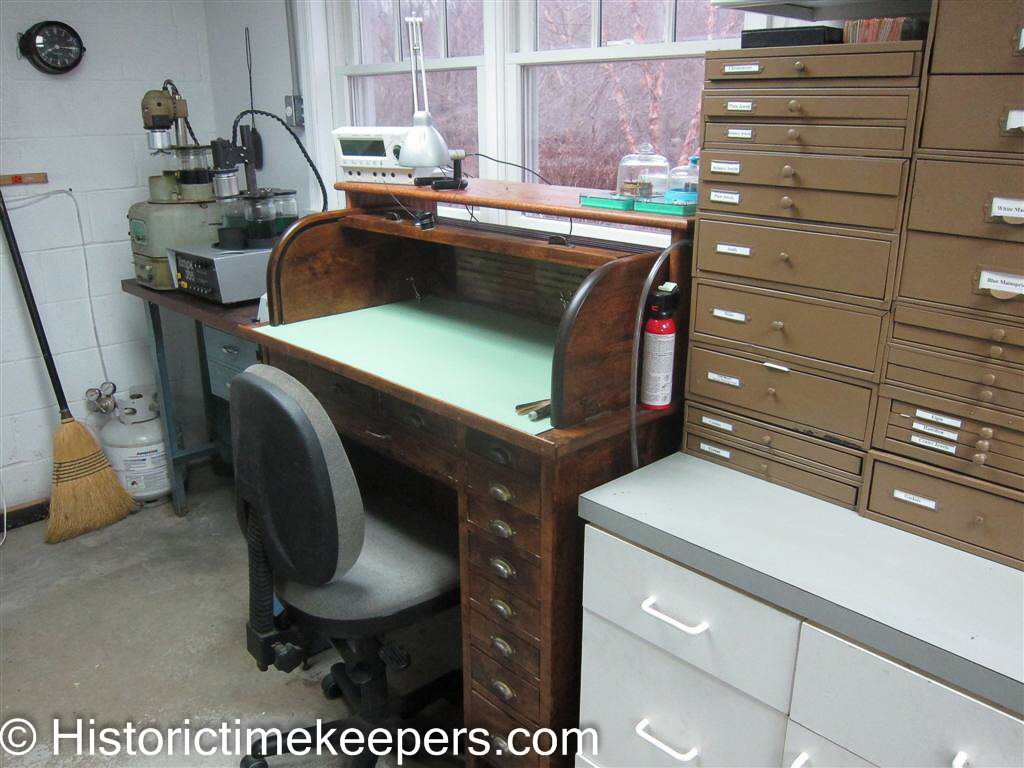
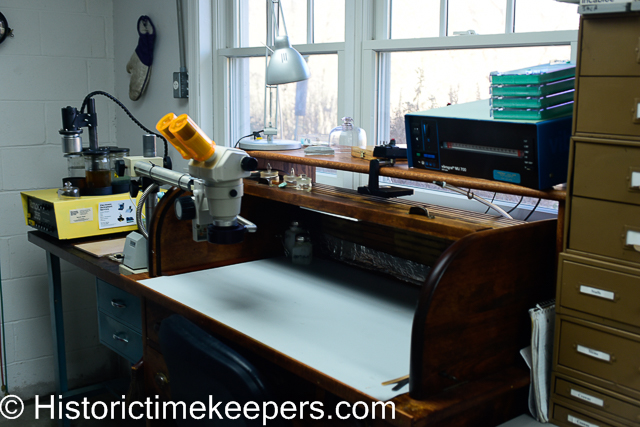
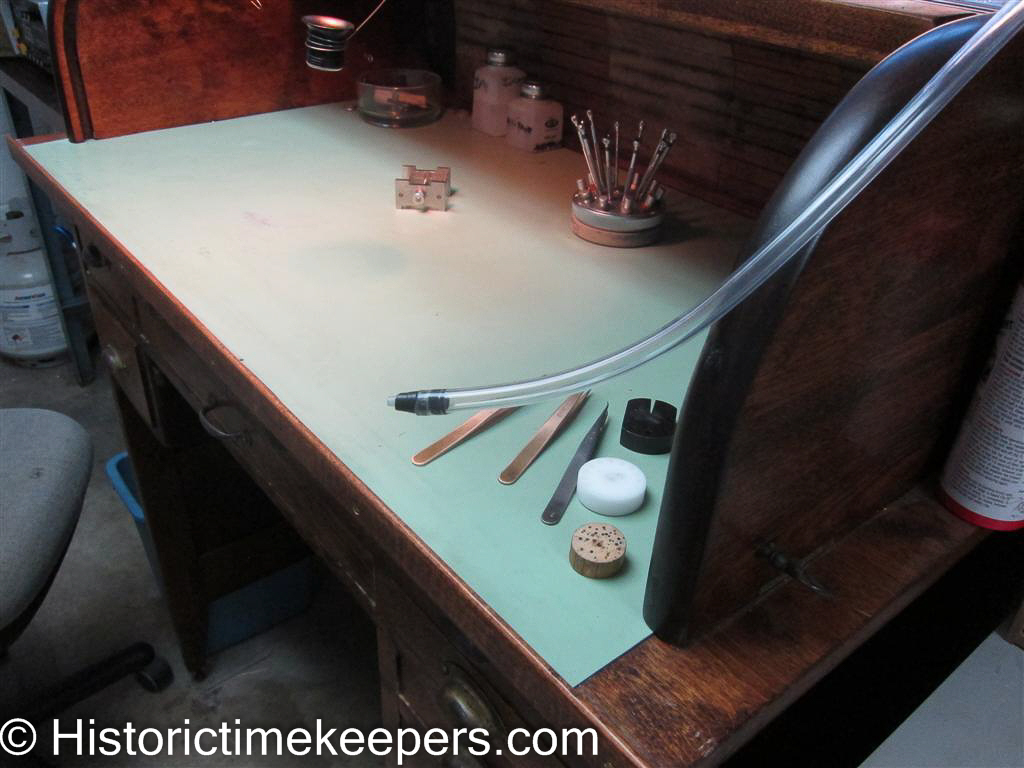
Above is my assembly bench as it today. I keep the top clear except for oil, the piece and the tools I need just then. To my left are my cleaning machines and demagnetizer. The machine baskets and Microscope accessories are in the 2 blue drawers. Bench air on the left, suction on the right under the Vibrograf MU-700. You can just see the tile I use to move heated plates to my bench for jewel adjustments. You might also note that the bench is raised on feet so that the work is at shoulder height. I keep my bench enclosed as much as possible to prevent the loss of parts. I also have sealed every floor to vertical surface joint within 15 feet of my bench.
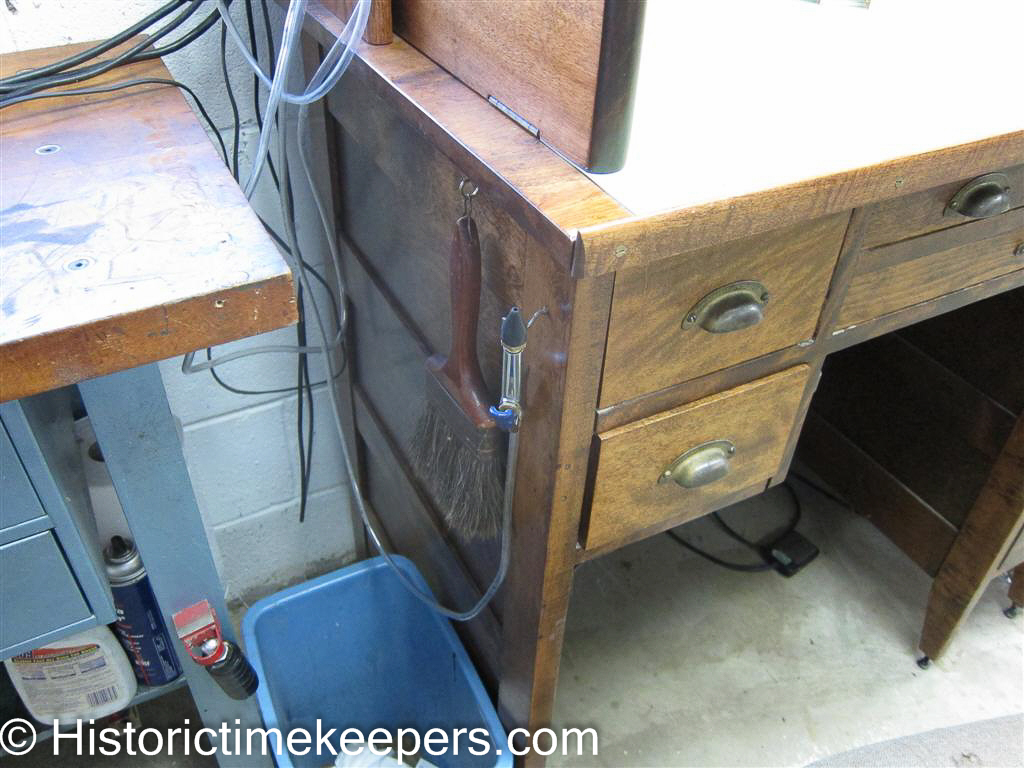
Cleanliness is very important to ensure maximum life and performance of the lubricants. The more chemically clean every part is, the better. While this is better explained on the page of "How we service", there is some equipment that watchmakers may find helpful. At my bench, I have both compressed air and vacuum. The air gun also has a hose long enough to reach the equipment on the small machine counter. The compressor is a standard pancake compressor kept in another room to keep the noise out of the shop.
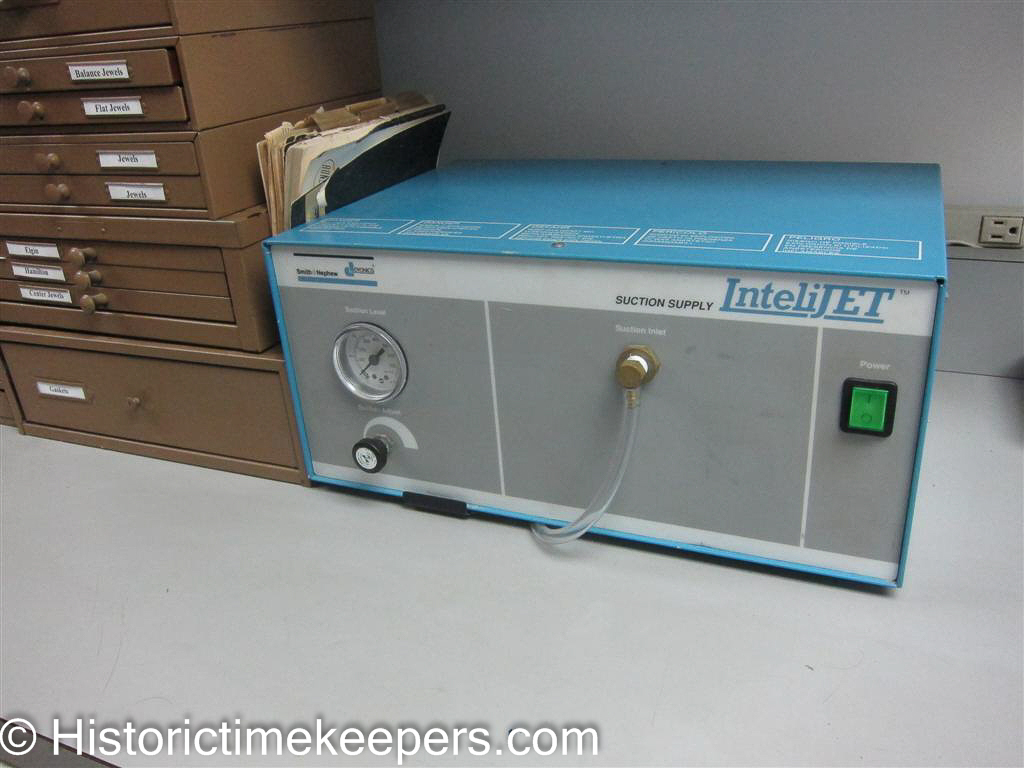
The suction is provided by a unit sold as surplus from a orthopedic surgical suite. Suction is used to remove any dust that may settle into the movement during assembly. And yes, suction is much better than blowing foreign matter deeper into the movement. Both nozzles have soft tips to protect the movement from scratches.
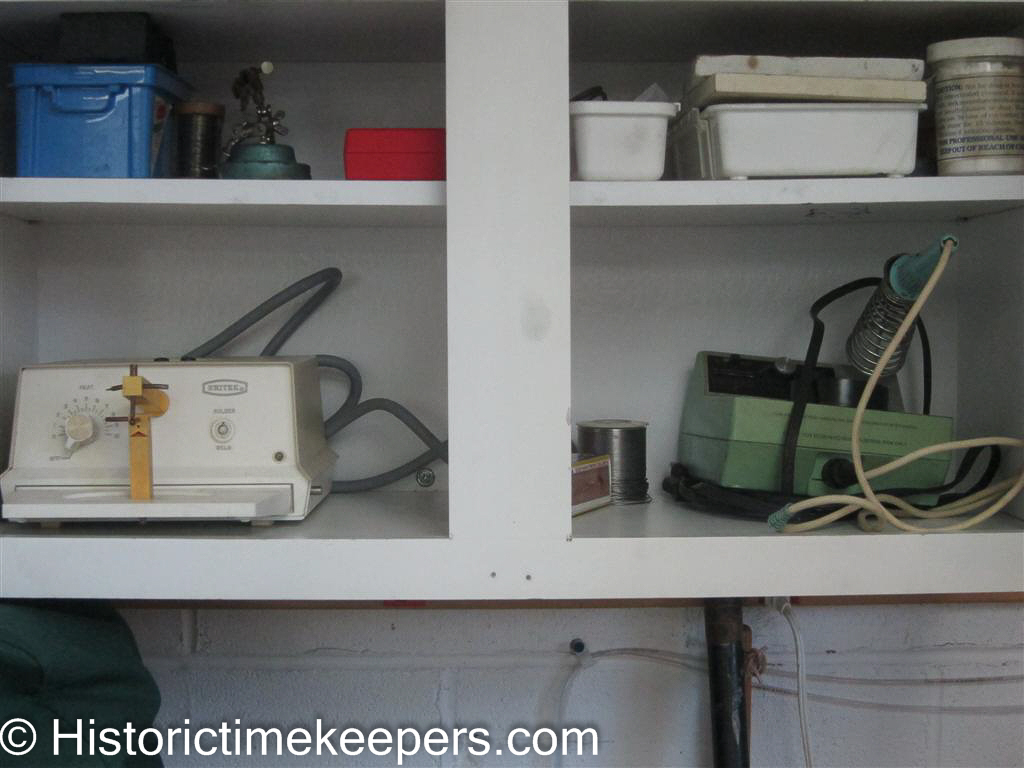
While on the subject of repurposed non watchmaking equipment: as any watchmaker will tell you mainsprings are becoming the lynchpin to completing a repair. Without going into all the details, it is increasingly important for a watchmaker to be able to modify mainsprings, especially the part that attaches to the barrel (mainspring bridle). The welder on the lower left shelf is made for another purpose entirely but is perfect when it comes to the task.
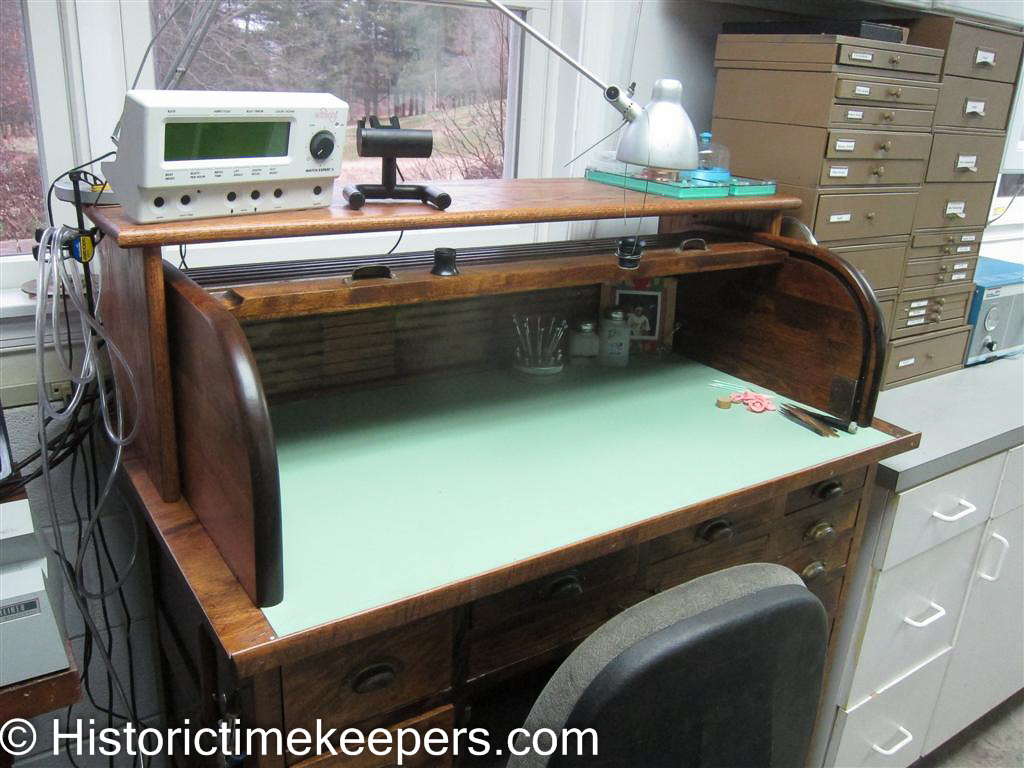
An important note about cleaning. It is extremely important to know how to properly use ultrasonics. I set the unit to barely buzz and on fragile pieces I will turn the ultrasonic unit off. This is because ultrasonic cleaning is only an assist to the cleaning solution. It works by cavitation which is the explosion of gas bubbles on the surface of the parts and is meant to loosen dirt to improve the action of the cleaning solvents. If set too high, it literally begins to blast away molecules of the movement. Any watchmaker who doubts me on this has only to look at his watch baskets to see the erosion and pitting on the baskets that has occurred over time. You can see my bench microscope, my bench air on the left hand side, my bench vacuum on the right (obscured by lamp) and my MU 700 in a convenient spot. My demagnetizer is just off to the right and the cleaning machine baskets are in the blue bench drawers. My bottles of heptane and IPA are in the corner of the bench. Everythign for routine service is ready at hand.
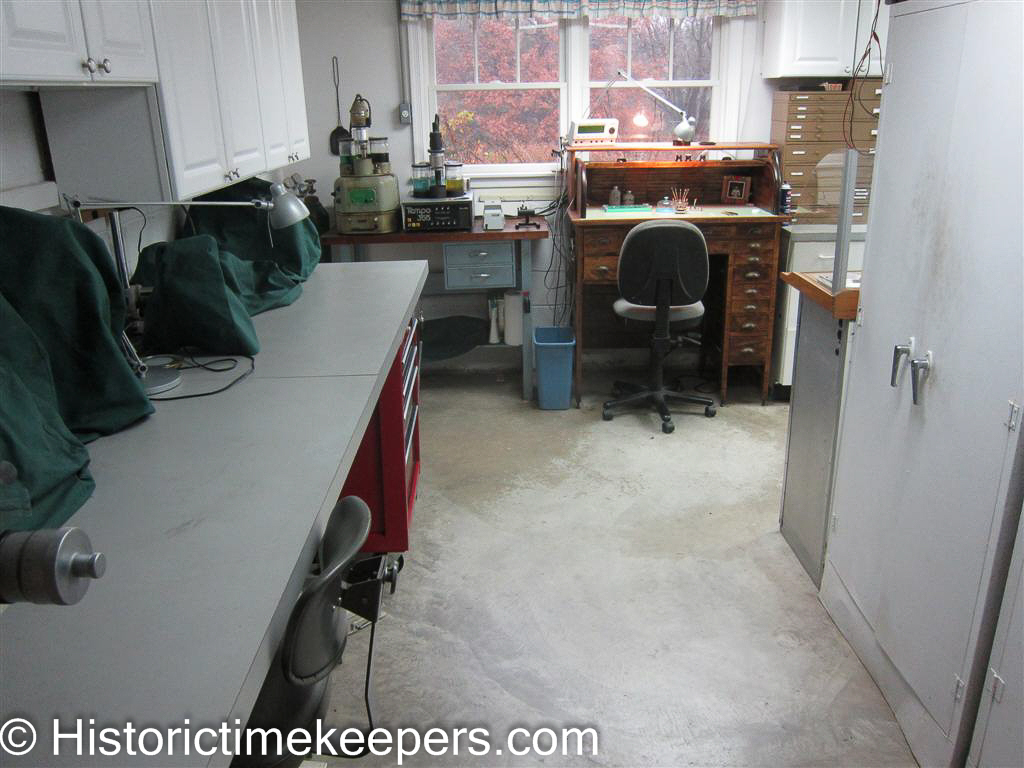
You may notice that I have found light to be one of my most important tools. In addition to North facing windows, every station has task lights and the walls are painted eggshell white for reflection. Note the change in my clearing station setup. Got rid of the Varimatic (use a tank ultrasonic for precleaning) and it now holds the equipment in the above photo. Working in a shop is an iterative process. It is always being refined.
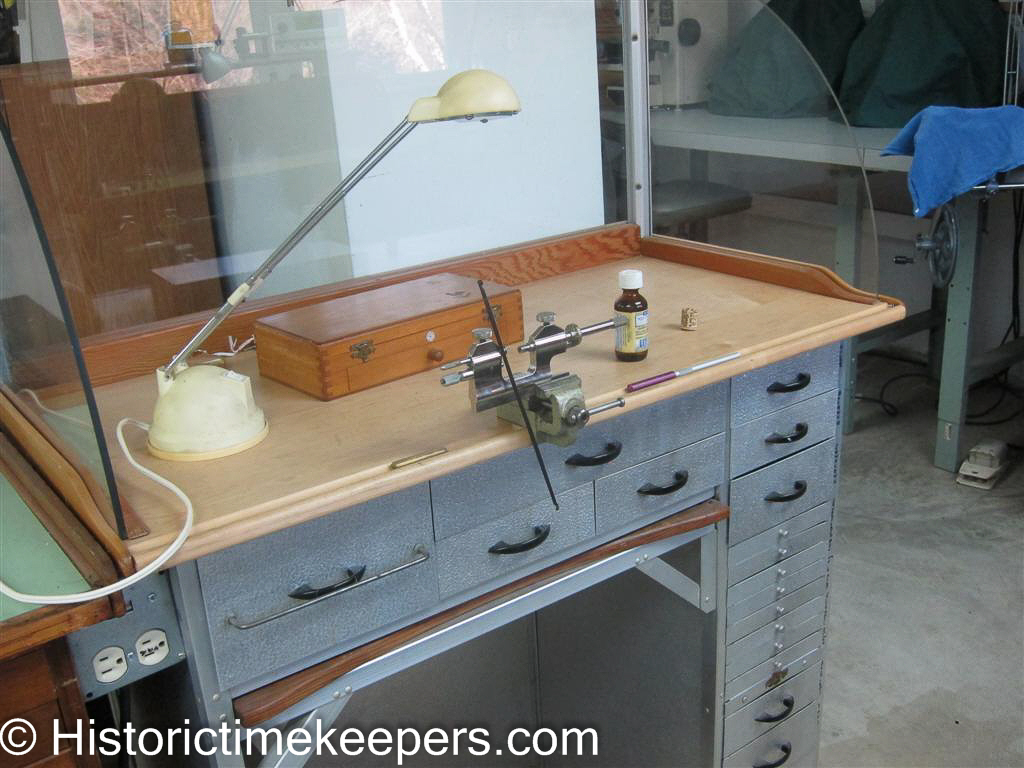
A cautionary note to those setting up a shop. Once stuff gets in the door or put in service you are less likely to clean it up. I prepared my shop room some 15 years ago. I can't bear the thought of tearing it all apart so that I can repaint although I am satisfied with the layout. Paint and electrify before you move any serious equipment into the room. Similarly, disassemble, service and paint all machine tools before you put them into service. BTW, the joke is that we get our shops in perfect form just in time for our widows to sell it. Those who have kept track of my site have seen machines and layouts come and go. You can even find photos in my photo series of projects that show equipment that has long since been sent on for someone else to use. Below is the view of the a "heavy" benches that are directly behind me when I am at my assembly bench. This is a post WWII Alfab bench made using aircraft grade aluminum skin. It is the only bench I ever found in which the drawers were designed for the kinds of boxes and tools a watchmaker has. The drawers in other benches use the space very inefficiently.
Here you also see the Jacot tool setup for use. This tool is used to BURNISH pivots to a perfect finish. It does this through the use of a steel or carbide tool pressing the pivot into a steel bed as the arbor of which the pivot is a part is rotated via a bow. This actually compresses the steel pivot, reducing its size by .01 to .02 mm, making it harder and providing an extremely smooth finish. This is NOT the same as "polishing" which removes material to reduce the high spots and provide a desired visual effect.
This has turned out to be a lathe I literally can't live without. It is a Swiss Habegger 102 (8 inch swing) tool maker's lathe. I used to have a Levin 10mm inch mounted instrument lathe; but I sold it within 6 months of acquiring this lathe. As you will see in other pics I still have a Levin 10mm I use for some operations, but THIS is the lathe that makes my heart sing. I use this lathe for preparing material for all sorts of jobs and I make tools and jigs on it. The dividing and milling attachments enable me to cut wheels as large as 6 inches in diameter.
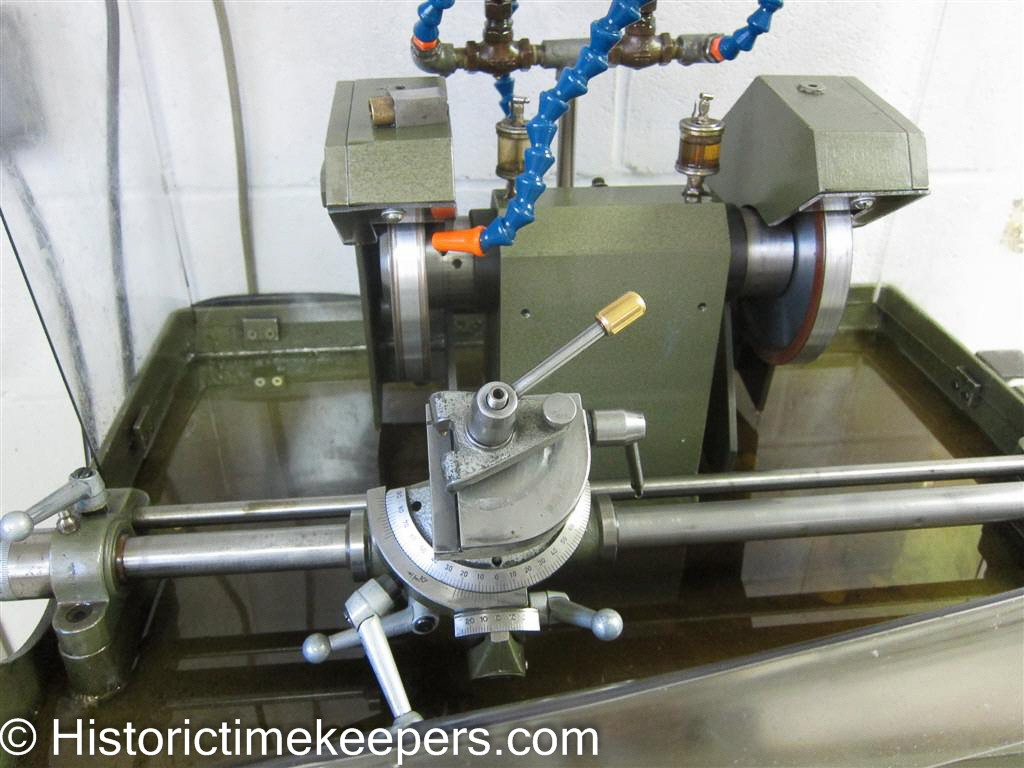
As you can see, I have a microscope mounted for use while turning and setting up wheel cutters. The slide rest is a double slide rest and not easy to find. I can thank Stef Brusky for this. It allows me to set the milling attachment BEHIND the work so I can see what is going on. And I can keep my tool post on the front slide. This means I do not have to setup and break down for different operations. Also, the microscope is attached to a tool tray at the rear of the lathe. This is a tray form a Baldor Grinder (tray can still be purchased) and is a great place to keep measurement instruments and sample pieces while turning. To the left of the lathe is a carbide tool grinder. We used this machine in Switzerland to prepare our cutters; it has diamond wheels and a clever clamping arrangement with a micrometer so that cutting tools can be very precisely made.
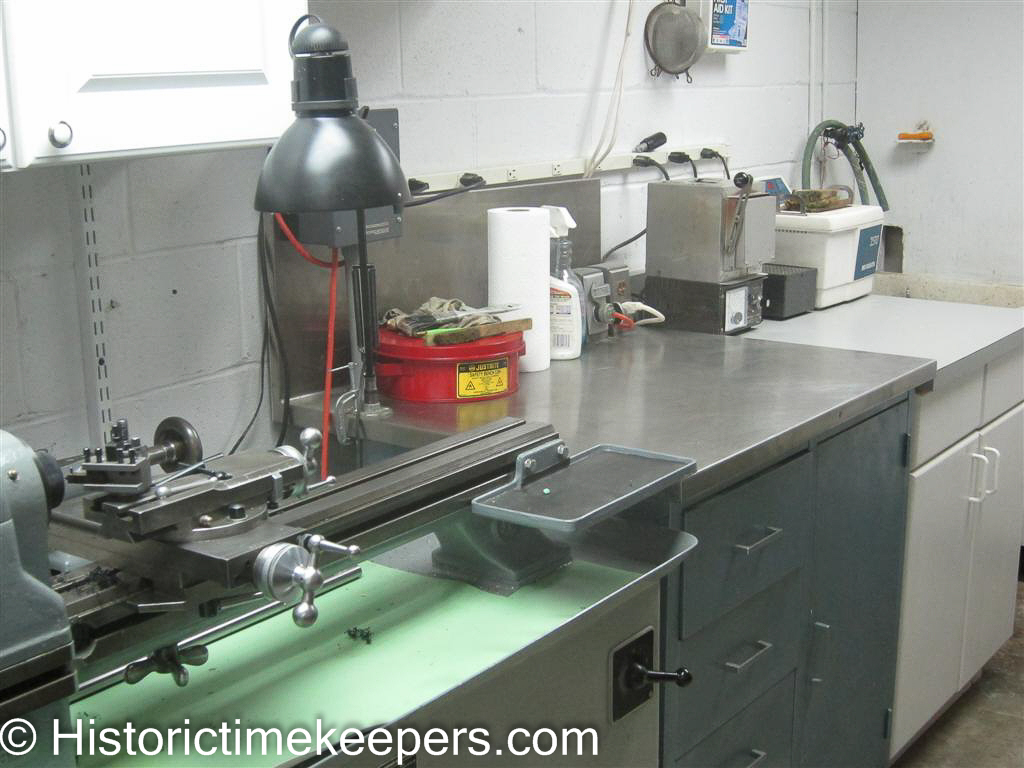
To the right of the Habegger lathe is my cleaning/heating/dirty area. I use the stainless top cabinet for precleaning mainsprings and barrels and for cleaning machine tool parts (the red safety can contains petroleum based cleaners). Looking down the counters you can see my heat treating oven, dryer for large parts and my ultrasonic unit for large parts such as chronometer plates. A note to machinists: the tray attached to the Habegger is a Baldor Grinder tool tray; it is VERY helpful for holding micrometers and calipers and such that you do not want getting dirty. Arthur Marks gets the credit for this idea! Here is an older setup, but it clearly shows the tool tray.
Below is my small machine bench. I keep everything covered to help with dust; I just throw them in the wash every couple months and I am not vacuuming equipment every time I clean the shop. I also keep all tools and accessories for the machines near them; to the point of having two sets of wrenches and Allen wrenches; one at the Habegger and one at this counter. The covers were custom made by my wonderful wife!!!
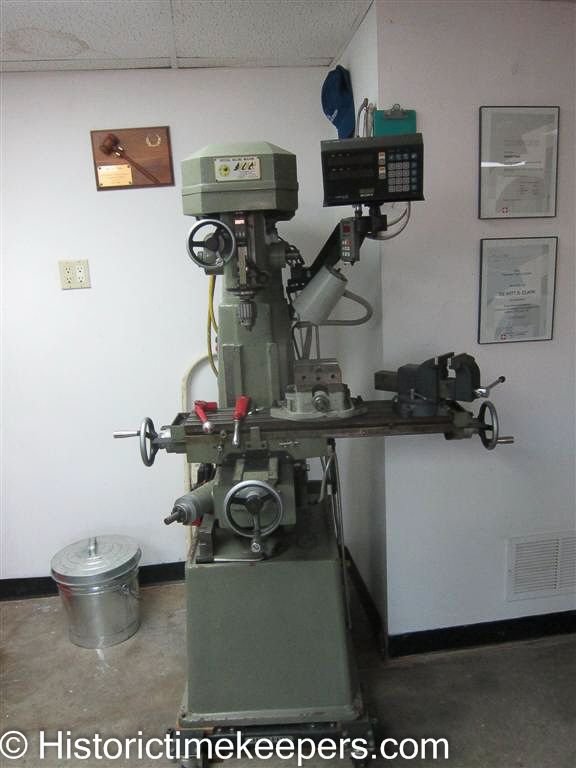
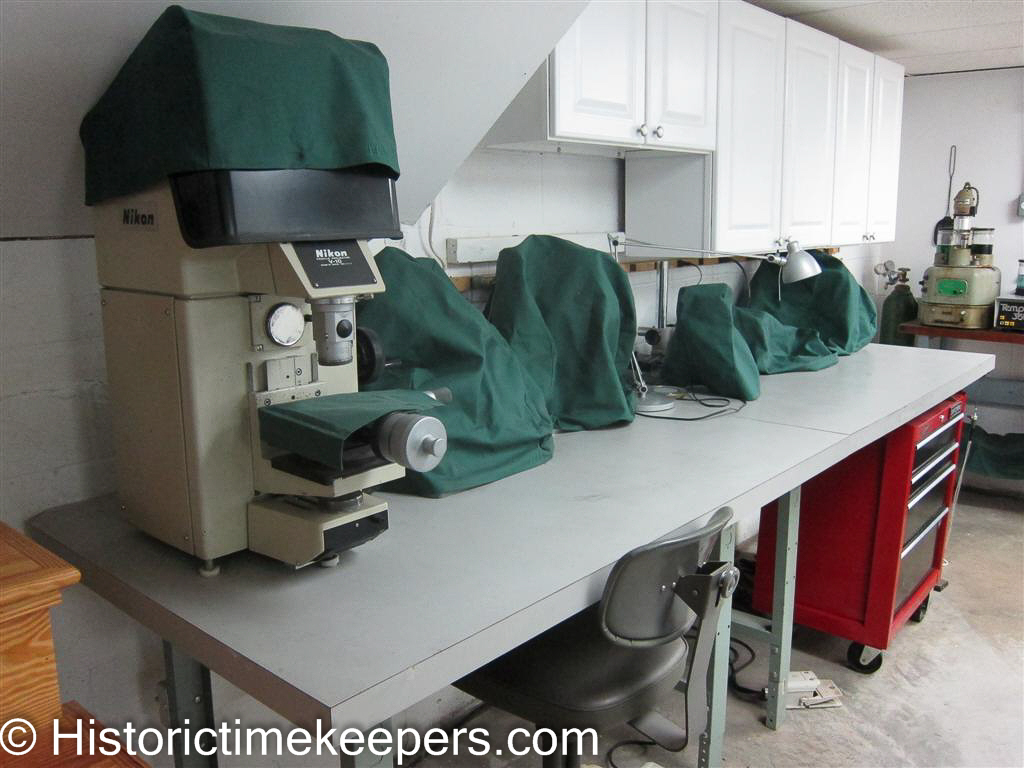
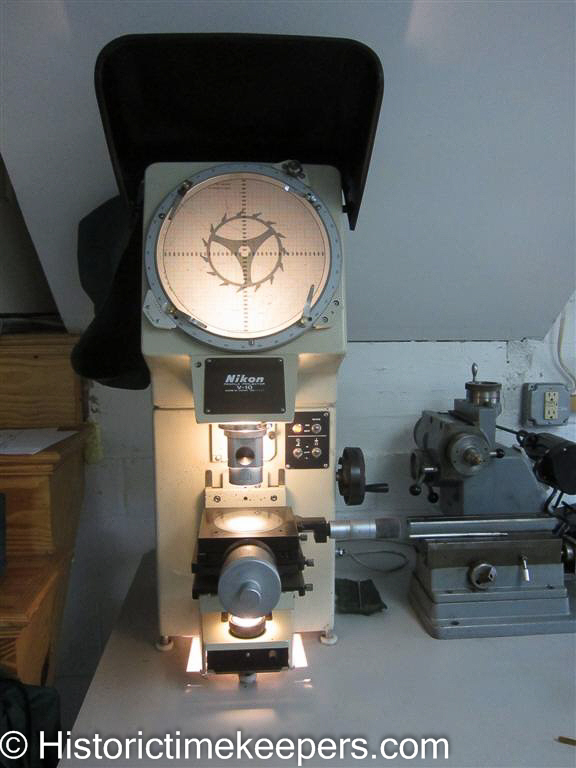
Below is my optical comparator and you can see my bench top vertical mill. The comparator is essential (?) for picking up dimensions of existing and made parts, inspection, and for determining angular relationships on a part (there is a protractor frame with a vernier scale within which the glass rotates). The part is positioned on the stage (with the two big micrometers) and light can either be reflected off its surface or transmitted from below. A 10X image is then projected onto the glass.
Going down the bench are my two benchtop milling machines. The first is an RJS horizontal mill to which I fitted a WW lathe bed so that I could use my Levin Headstock and Dividing plates. It has both a lever and screw feed for cutting either wheels or pinions. I do not use this too much these days but I hate the idea of selling it. (But I eventually did after using the Sherline for a couple years. I also use my Schaublin for a lot of wheel cutting)
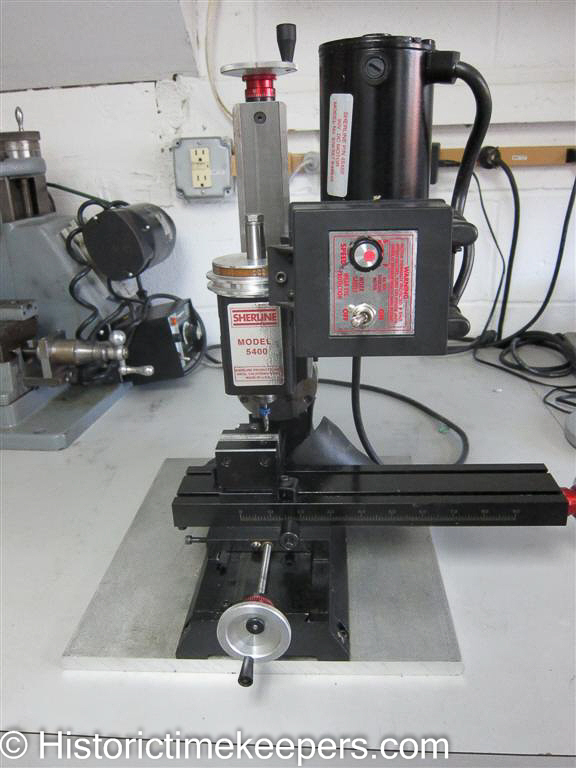
Next is my Sherline vertical mill. Far too many dismiss this as a "toy" because of the aluminum construction. The light feel is perfect for watch work and the attachments are all readily available and very reasonably priced. I strongly recommend that aspiring watchmakers forgo the purchase of a milling attachment for their WW lathe and purchase this; then fit a WW lathe bed to a tooling plate for use on the Sherline. You can then do anything you could ever do with the milling attachment but THEN you have vertical milling machine as well!
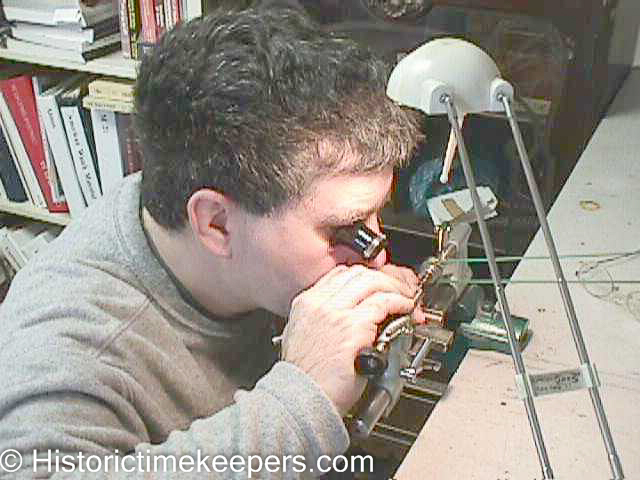
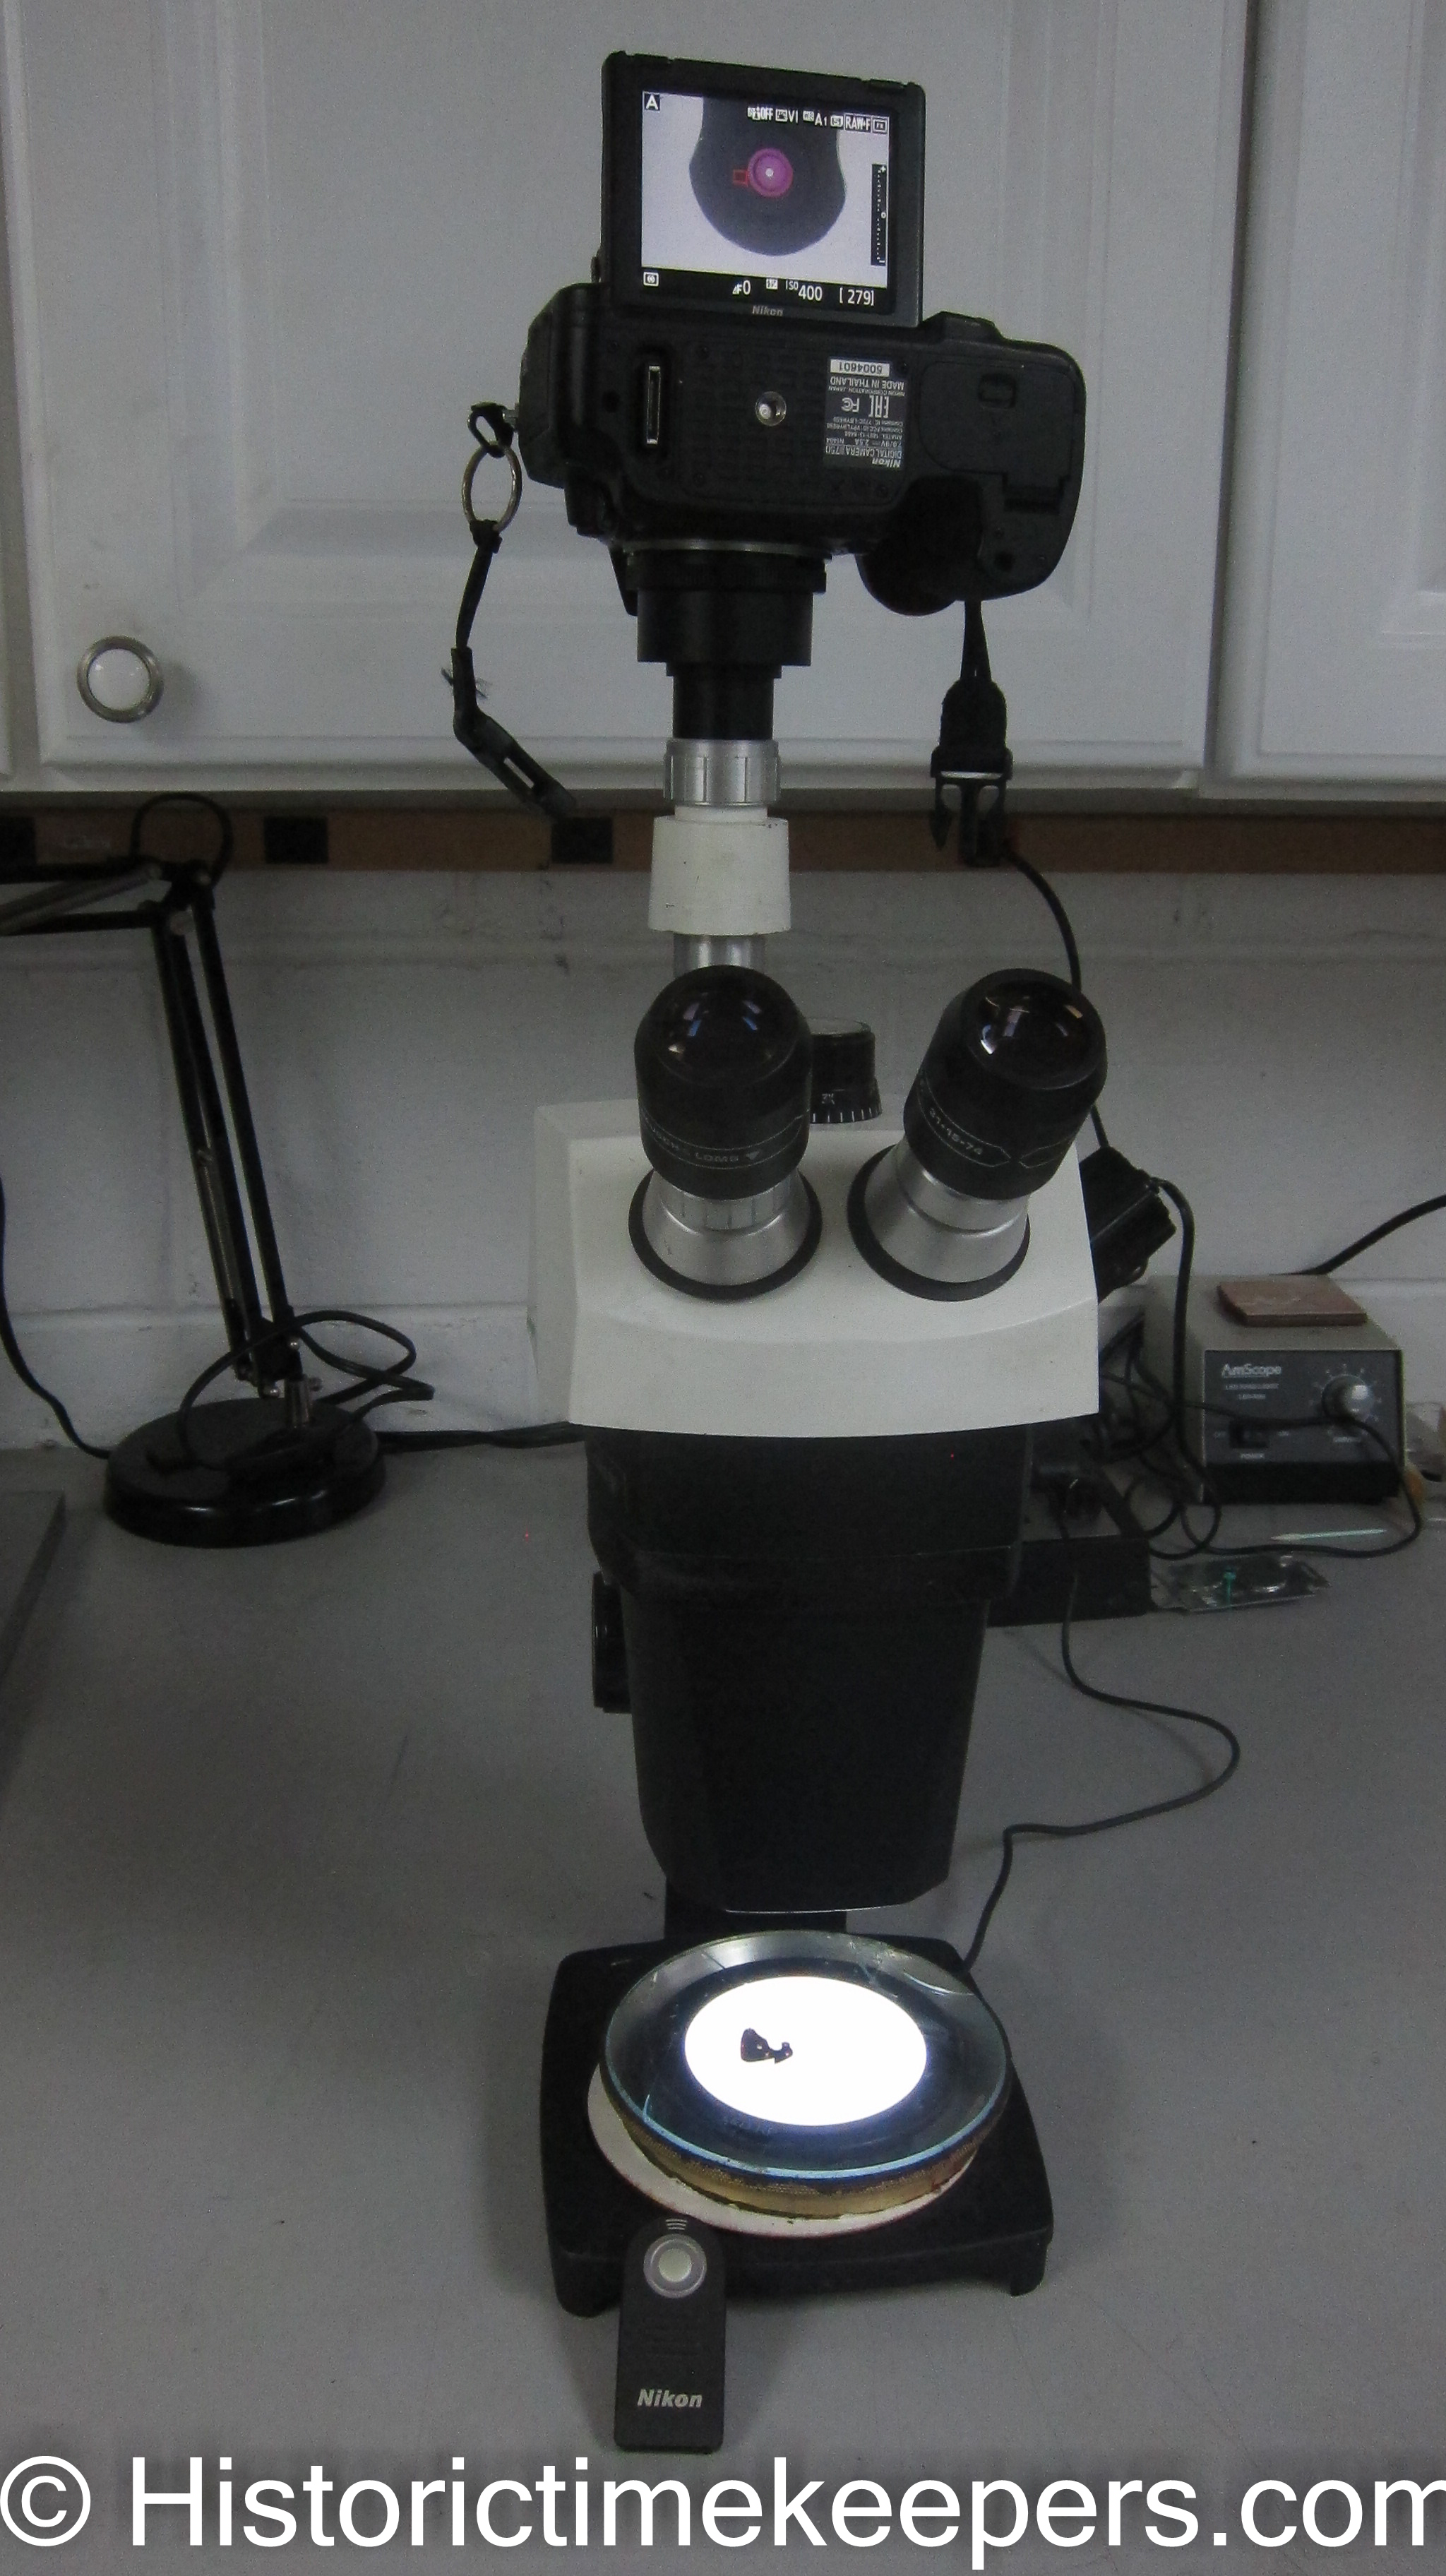
The microscope is a very useful tool in the watchmaker's shop. Not only is it good for inspecting watches for defects, it is very helpful when making adjustments and can also be used for working at the lathe. This microscope has up to 100X magnification which exceeds the requirements for the Omega Service Provider. I also have a port for my camera that I use for documenting things that I find and for showing things on the camera viewer when a customer happens to stop by with their timepiece.
Today there is no excuse for a watchmaker to not won at least one microscope. The above microscope and those eyepieces ran over $3500 just 29 years ago. They were even used in govt agencies for photo interpretation. Today the can be had for under $500 in excellent condition. To learn more about the usefulness of microscopes, visit our Microscopes in Watchmaking page. The lathe below is my Levin 8mm lathe. I use this lathe quite a bit for preparing staff blanks which are finished on the Steiner and for the usual kinds of work.
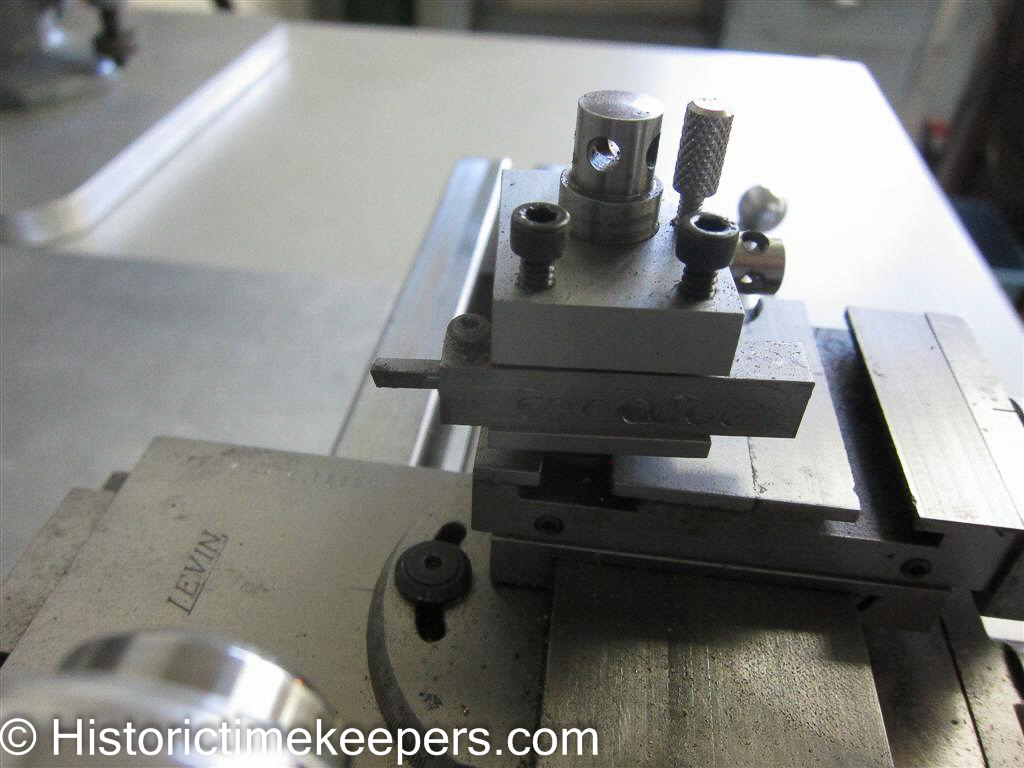
Watchmakers may notice the tool post on this lathe. It is of my own design. I got annoyed with the crude adjustments on other toolposts and when I started grinding my own carbide toolbits I decided something had to change. The toolpost itself is simply a post that clamps into the t-slot of the sliderest. The tool block then clamps onto that post and you may see the thumbscrew used to adjust the height. The tool block can then be rotated 360 degrees without losing the height adjustment.
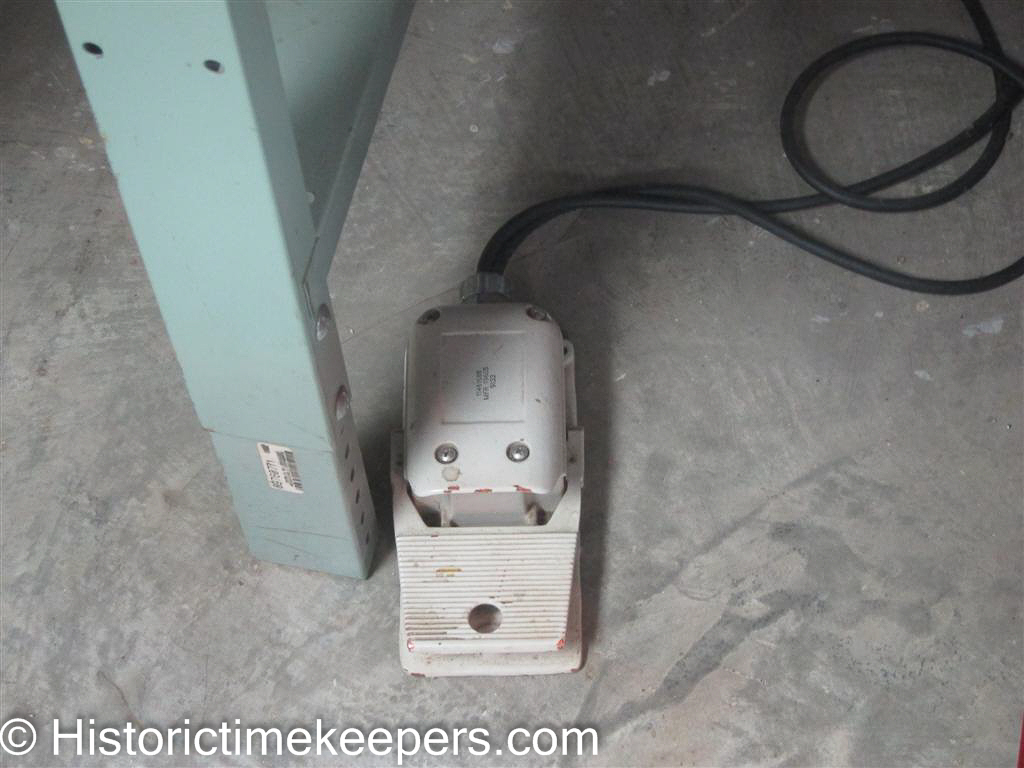
The tool bit holder clamps into the tool block. I use the SAME bit holders (AND carbide bits) on both the WW lathes and the Habegger. This means having but one library of cutters. I HATED having all sorts of different sized cutters. I have mounted all my small machine tools on 1/2 inch aluminum plate. They are driven by Sherline motors and I have adapted the electronics to include a reverse switch and a foot operated on/off switch. This frees me from hunting for the right speed with a traditional rheostat.
This is my sensitive drill press. Over the years I have switched back and forth between the Schaublin and the Levin. I am sticking with the Levin. I finally decided to get rid of multiple collet systems and the Levin takes the WW and the Schaublin takes a P-* type collet. You can also see how I use the microscope for working at it. I got rid of my 10mm equipment and other things that took a different series of collets,. Today I use WW, ER-32 (large vertical mill) and W-20 collet (102 and Agathon grinder).
Below is an example of how I group equipment. The collets and usual accessories for the 8mm lathe are immediately at hand.
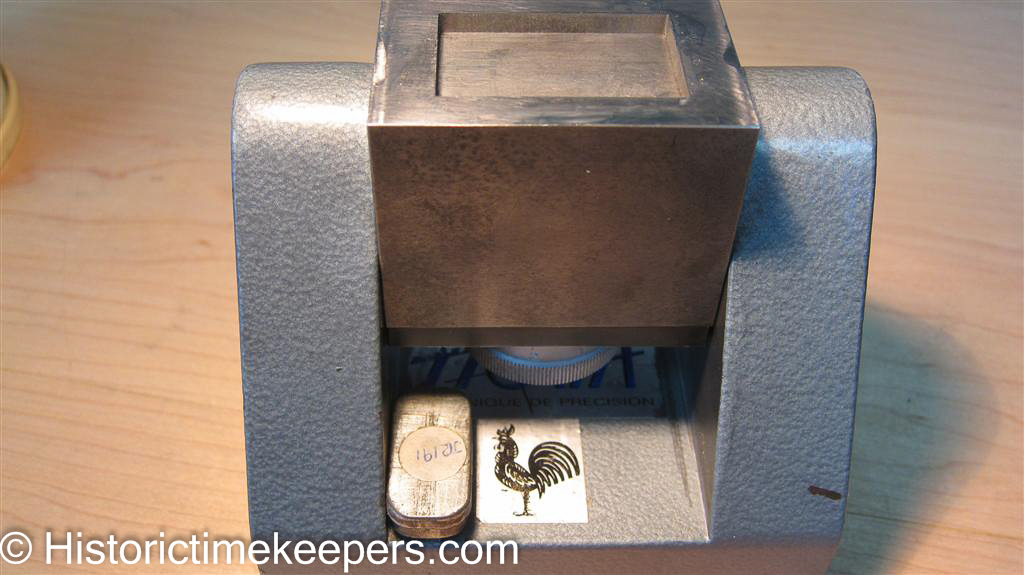
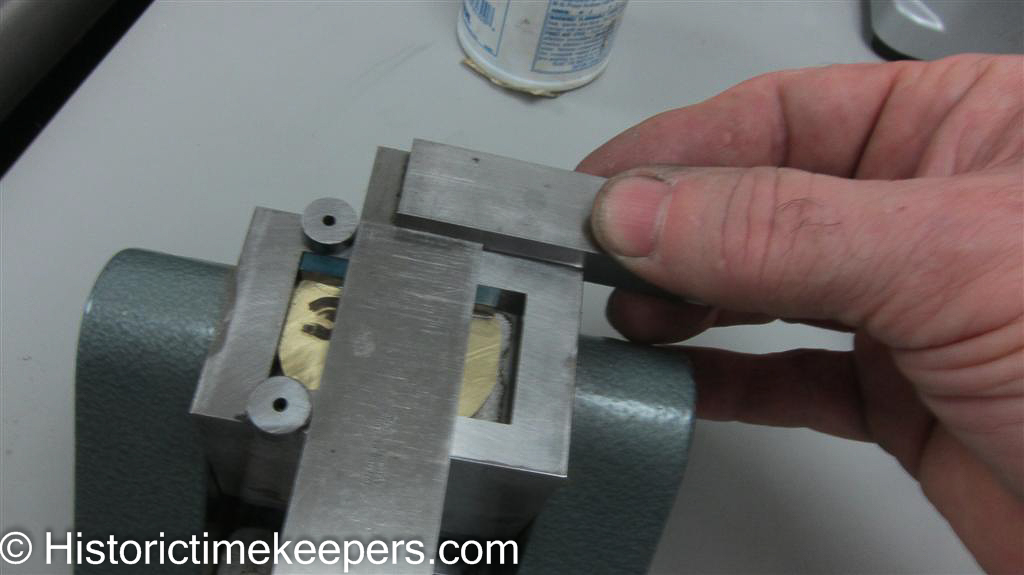
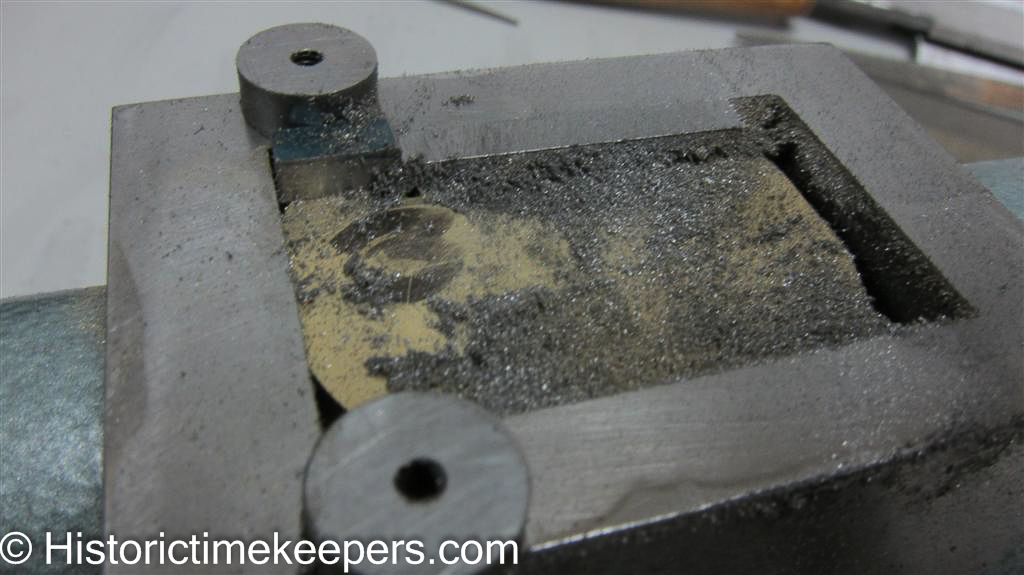
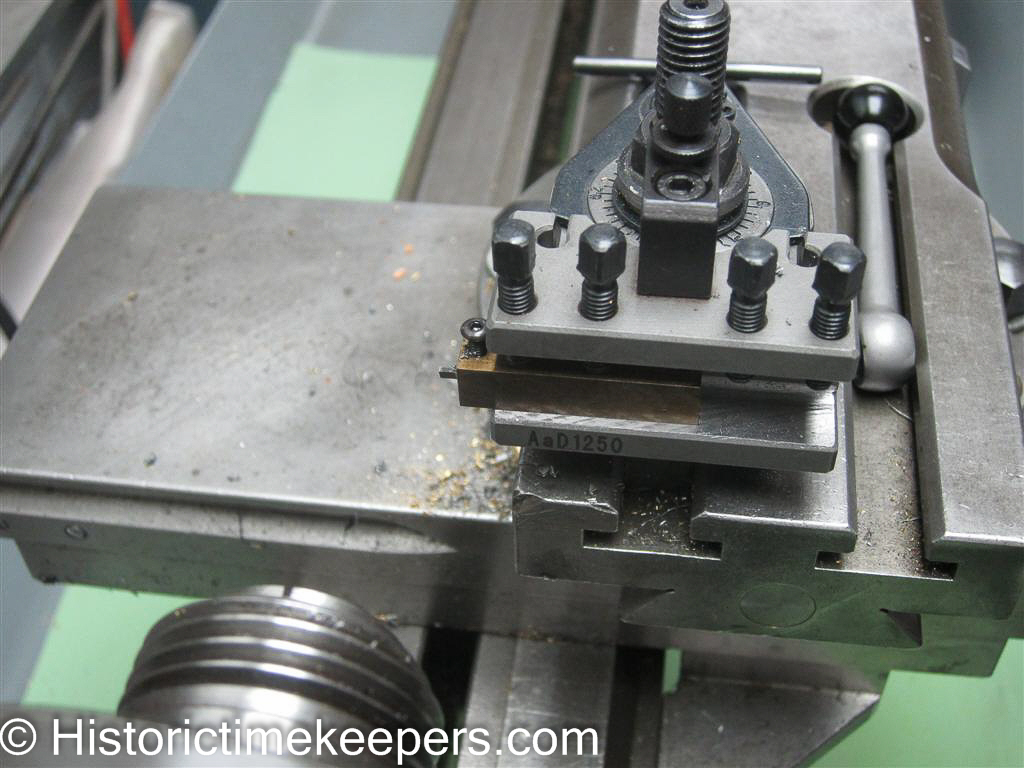
This is a tool not many have seen; while it is in current production its cost new is fairly dear and it is sold primarily to makers of custom watches. It is called a swing tool; this is made by Horia. Its use is in precise filing. The Horia design has two advantages: a micrometer adjusting table and squared edges. Typically these are round because it is easier to make a precise round hole and round table (think engine cylinders). However, if it is squared, setups become very simple as can be seen in the following photos. The table and housing are dead hard steel; this means they cannot be cut with a file. It is an ideal jig for filing parts such as chronometer detents.
Although I use it infrequently, the vertical mill is essential when I need it. I can also use it as a drill press. The Sony Digital Read Out enables me to locate positions to within 1/100th of a MM. This technology measures the location of the table relative to a magnetic strip mounted on the non-movable casting and eliminates errors due to imperfections in the lead screws or wear.
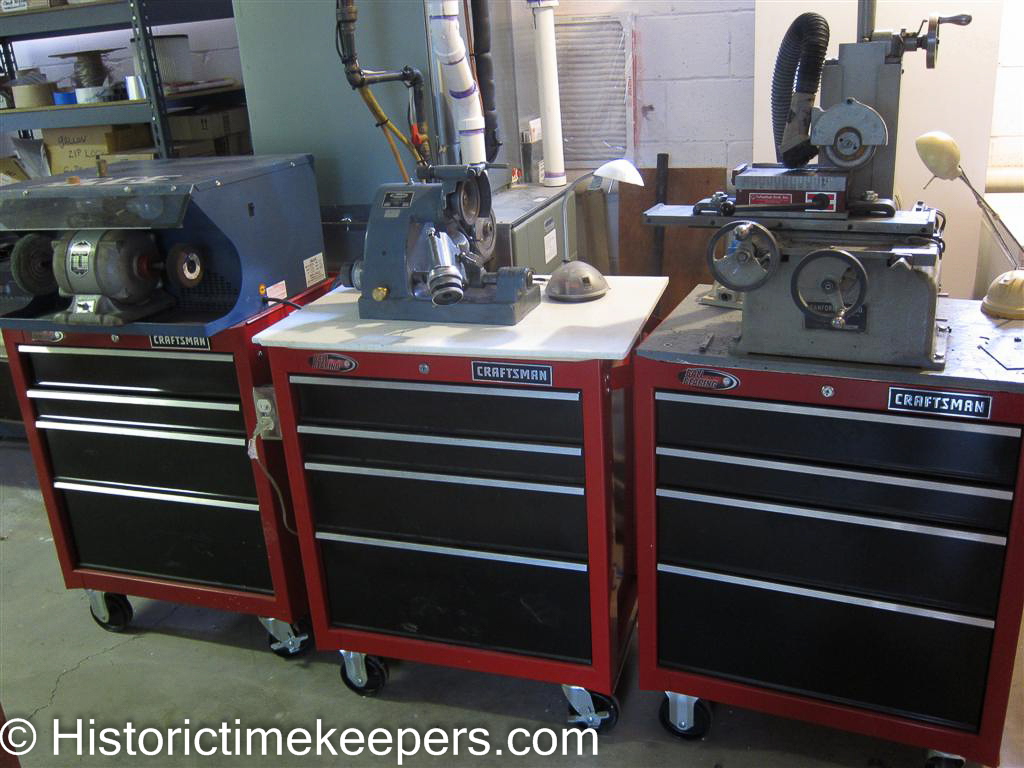
Some other machines I have come to appreciate. To the right is a Sanford bench top surface grinder. I have used it for everything from reducing the heights of watch mainsprings to reducing hardened detents to size on this machine. I have a shop vac arranged to collect the dust. Next is an Alexander (Deckel Licensed Copy) single point cutter grinder. This does the same things as the cutter grinder in the shop except it does not have an oil bath to knock down the dust. However, it also does some operations not easily done on other machines; so I keep it. In fact, I roll it out to use to sharpen my carbide gravers when hand turning. Next is the traditional two speed buffing machine. Note they are all it is on casters so that I can roll them to the door for shooting the dust outside when if the job is particularly messy.
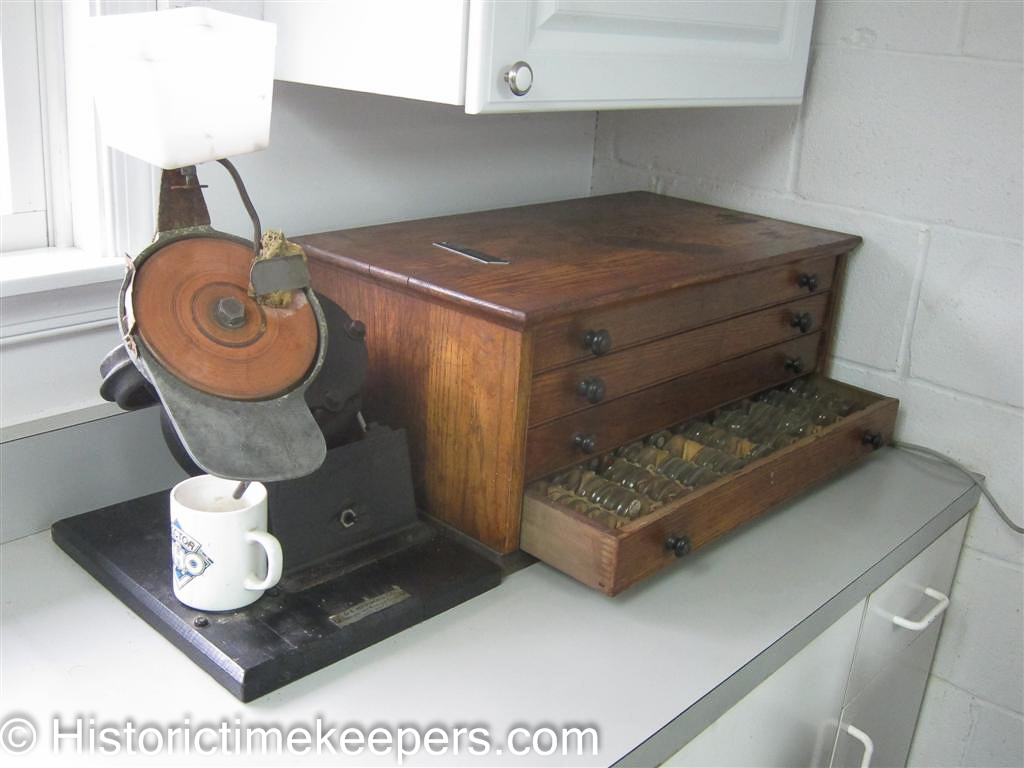
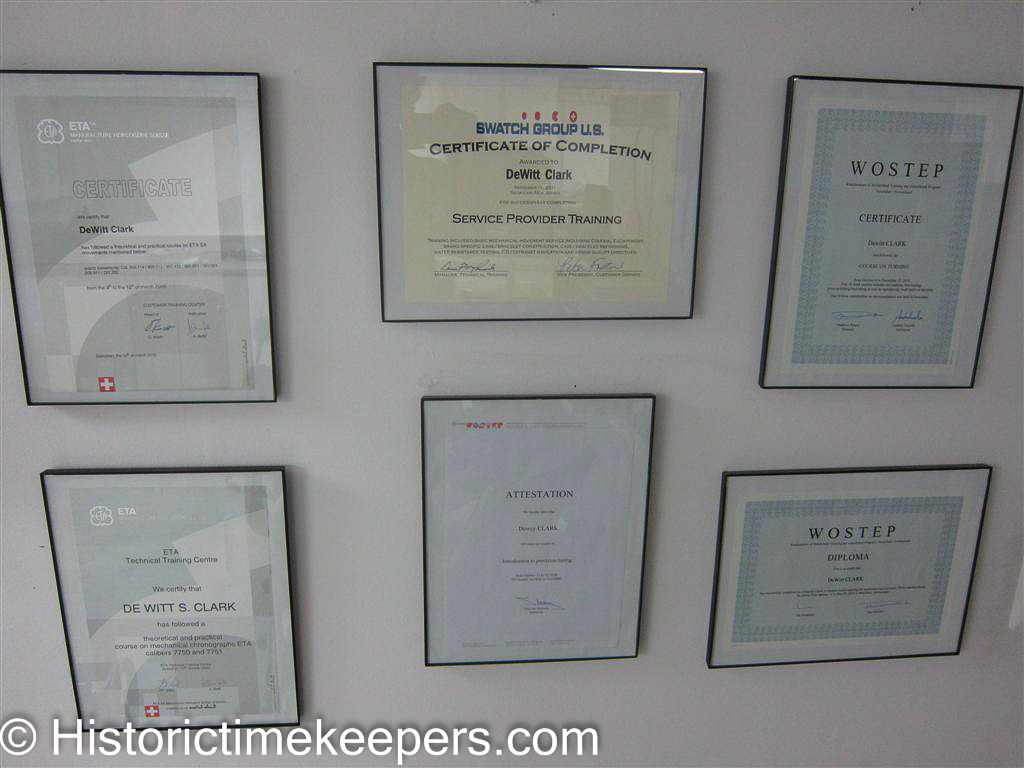
This is the crystal fitting area. Glass crystals ALWAYS need to be ground to size, despite having a full assortment of glass crystals. It is improper to enlarge the watch bezel to accept the crystal. The cardinal rule in restoration is "Fit the replacement to the original". Last but not least, is my knowledge and my attention to life-long learning. While these papers are generally not important to other watchmakers (and likely should not be); they ARE important to me. I devoted a great deal of effort to earn these pieces of paper.
|
||||
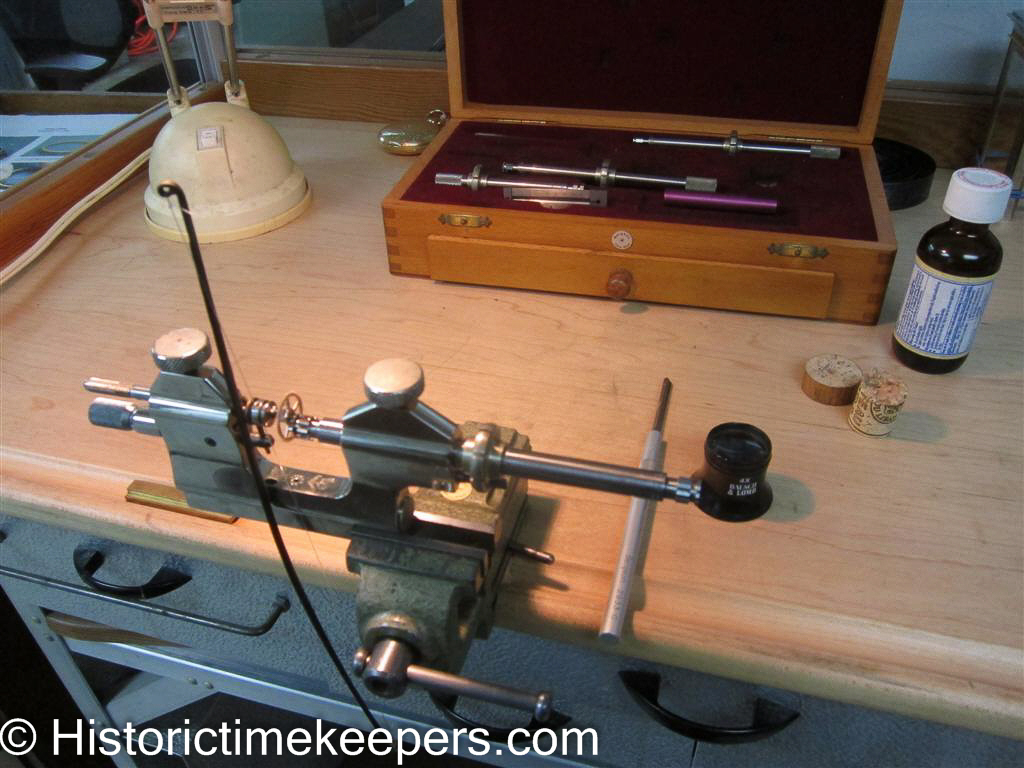


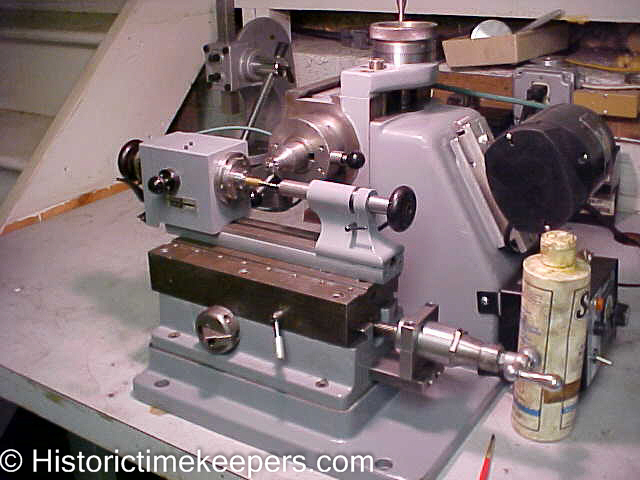
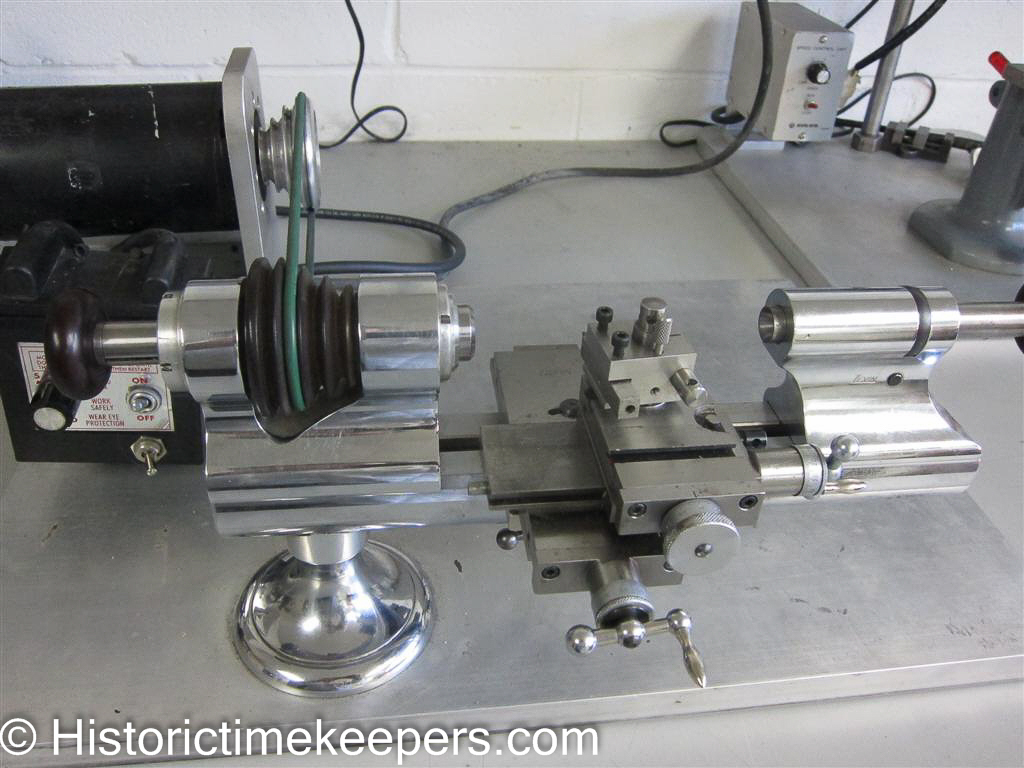
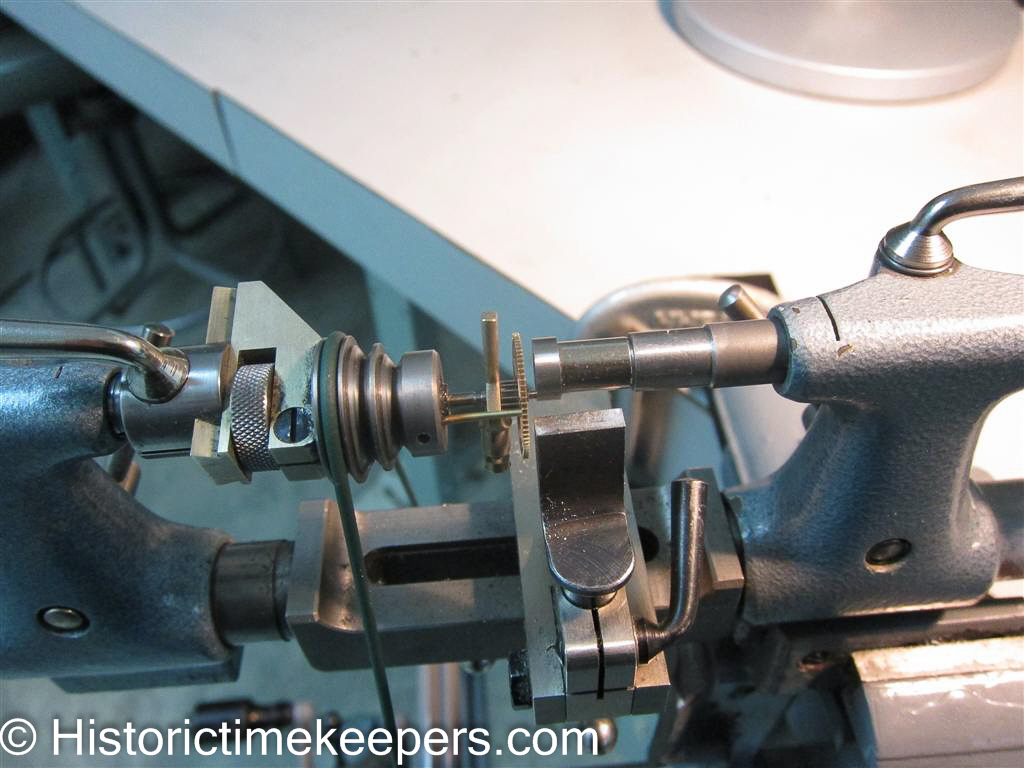
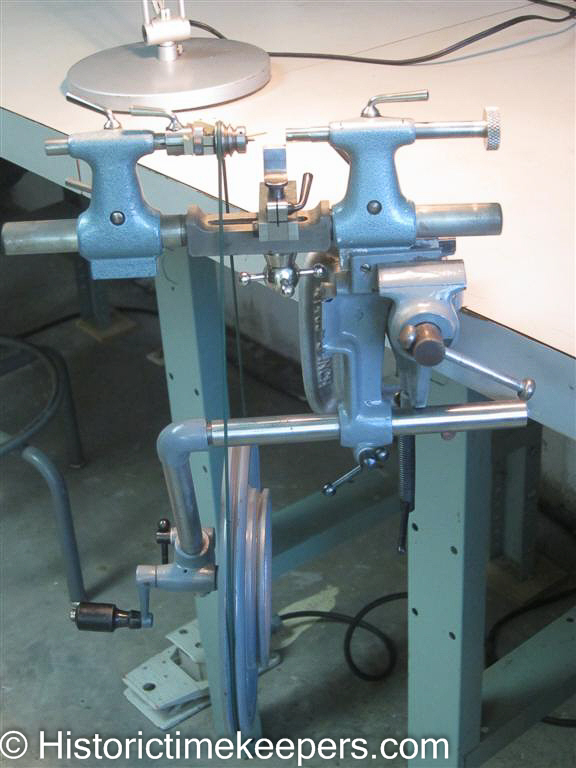 When
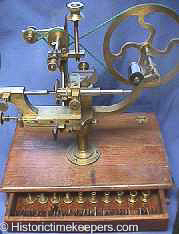
I am making a balance staff or need to make a part that MUST be
perfectly concentric, I finish the blank on this Steiner Dead Centers
lathe. The work is suspended between two pointed (or hollow cup)
bearings and is driven with the aid of a pin temporarily attached to the
work. The advantage of a dead center lathe is that the work can be
removed for measurement or fitting and replaced any number of times with
complete assurance that the work will always be returned to the same
position. It is the ONLY way to ensure "truth" when a
piece must be removed prior to being fully machined. The Steiner
lathe is better than all other dead center lathes because of the way the
system is thought out. It is very easy to use and nothing gets in the way of the turner when he is working. This is the only
dead center lathe that is still made today.
When
I am making a balance staff or need to make a part that MUST be
perfectly concentric, I finish the blank on this Steiner Dead Centers
lathe. The work is suspended between two pointed (or hollow cup)
bearings and is driven with the aid of a pin temporarily attached to the
work. The advantage of a dead center lathe is that the work can be
removed for measurement or fitting and replaced any number of times with
complete assurance that the work will always be returned to the same
position. It is the ONLY way to ensure "truth" when a
piece must be removed prior to being fully machined. The Steiner
lathe is better than all other dead center lathes because of the way the
system is thought out. It is very easy to use and nothing gets in the way of the turner when he is working. This is the only
dead center lathe that is still made today.